Breads Bakery Challah
Beyond the iconic braided loaf, this challah recipe is also our go-to dough for an endless assortment of sweet and savory breads, including bake-at-home versions of our world-famous chocolate babka and babka pie.
Ingredients
Makes 2 large challahs (freezing instructions included)
For the Dough
320 grams (1½ cups) water
14 grams (1½ tbsp) dry active yeast, or 30g (3 tbsp) fresh yeast
800 grams (about 6 cups) sifted bread flour
80 grams (6 tbsp) sugar
12 grams (1 tbsp) table salt
2 eggs
60 grams (1/4 cup) canola oil or melted butter, cooled
For Finishing
1 egg (for egg wash)
Seeds for decorating (sesame, poppy, nigella, etc.), optional
Suggested Equipment
• one large mixing bowl, or a stand mixer
• bowl scraper, or your hands
• clean kitchen towel, or plastic wrap
• bench knife, of chef's knife
• sheet pan lined with parchment paper
• pastry brus
![]()
VARIATIONS
Flavored Challah (Raisin, Chocolate Chip, Walnut, etc): as a general rule, we like to add any flavoring mix-ins in a proportion of 20% of the weight of the dough. In other words, the full recipe of challah above (1400g of dough) should include about 280g of any additional mix-ins.
For dried ingredients like raisins or nuts, soak them in water for 5 minutes prior to straining and adding into the dough (skipping this step will result in a dry and slow-rising dough). For wet ingredients like olives, toss them in cornmeal or flour before adding them in to prevent a sticky mess. Chocolate chips need no preparation, because they are perfect.
Add any inclusions at the end of kneading, after the dough has fully come together into a smooth ball. Cut the dough up into several pieces to increase the surface area and then gently fold in the extra ingredients, eventually forming the dough back into a rough ball. It may seem at first like it's too much, but trust us, it will be worth it!
Return the dough to a clean, covered bowl to proof. Any straggler mix-ins can be thrown on top (or eaten by the baker).
Process
MIX THE DOUGH
- Measure out all ingredients and set aside.
 For best results, we recommend using a kitchen scale to weigh ingredients instead of measuring with cups & spoons.
 - Add the yeast to the water:
For dry active yeast: Warm the water until it is 110 degrees Fahrenheit (it should feel very warm but not too hot to hold your hand in for 5 seconds). Pour the water into a large mixing bowl and sprinkle the dry active yeast into the water. Let sit for about 5 minutes to allow the yeast to activate.
For fresh yeast: Crumble the fresh yeast into room temperature water and proceed to step 3. - Add the flour, followed by all remaining dough ingredients.
- Knead the dough:
By hand: Using your hands and/or a flexible bowl scraper, combine the ingredients until the flour is incorporated, then remove the dough from the bowl and knead by hand for approximately 8 minutes or until smooth, using the smallest amount of dusting flour possible. Form the dough into a tight, even ball.
In a mixer: Using a dough hook, mix on low speed for 4 minutes to combine ingredients; increase to medium speed and knead for another 5 minutes until a soft, smooth dough is formed. Remove the dough onto a lightly floured work surface and form into a tight, even ball. - Proof the dough: scrape your mixing bowl clean, lightly flour the inside and place the dough seam-down into the bowl. Cover it with a kitchen towel or plastic wrap and let rise in a warm, draft-free spot for about 30 - 45 minutes or until roughly 1½ times larger in volume.
 When in doubt, err on the side of less proofing time, as an over-proofed challah dough will be difficult to braid and roll out.
Making this dough for another recipe? Switch back over to the Chocolate Babka or Babka Pie recipe now!
BRAID & PROOF
- Divide the dough: remove the proofed dough from the bowl and onto a lightly floured surface. Gently press it into a rectangle, de-gassing slightly to remove excess air. Using a bench scraper or knife, divide the dough vertically into 2 equal parts, then divide each part horizontally into 3 even rectangles, adjusting as needed so that they're equal in size. You should now have 6 rectangles.
- Form the strands: one piece at a time, set the dough lengthwise in front of you. (Cover the remaining strands with a kitchen towel to prevent them from drying out while you work). Starting from the right side and working your way to the left, roll the top edge of the dough toward yourself and seal the edge along the center of the rectangle using your fingertips or the heal of your hand. Repeat this process one or two more times, working right to left and rolling the top edge of the dough toward you tightly and evenly. Finish by sealing the top edge to the bottom edge to form a taut, even cylinder.
- Roll the cylinder into a 16-inch long strand, starting in the middle and using extra pressure at the ends to taper.
- Repeat steps 2 and 3 for each rectangle to form 6 tapered strands.
 Take your time to form the strands tightly and evenly, as this will help ensure a final loaf that has the strength to hold its shape after proofing and baking. If you're dough is rising too quickly and becoming hard to handle, cover the remaining strands in the fridge while you work.
 - Braid the strands: set up three strands vertically so that the top ends touch but the bottom ends are separated by several inches. Braid together by placing the rightmost strand over the middle strand, then the leftmost strand over the new middle strand. (Don’t worry if the top starts to come undone – you will fix this at the end). Repeat until there is about ½” left, then press the ends together and tuck them underneath the braid. Finish braiding the top end by placing the outer strands under the middle strand rather than over. Press the ends together and tuck them underneath. Adjust the shape of the loaf with your hands as desired to emphasize the overall tapered look.
- Repeat step 5 with the other three strands.
- Place the two braided challahs on a baking sheet lined with parchment paper, leaving at least 2" on all sides to allow for rising (or use multiple sheet pans if needed).
 See the note below if you'd like to freeze one or both challahs at this stage to bake at a later time.
 - Proof the challahs: cover the sheet pan loosely with a kitchen towel and let rise for about 1 - 1½ hours in a warm, draft-free spot.
- Preheat: about thirty minutes into proofing, position a rack in the middle of your oven and preheat to 400 degrees F.
 Want to bake your challah another day? Instead of leaving it to rise a second time, place the braided challah(s) directly into the freezer. Once solid, wrap well with plastic wrap and aluminum foil and freeze for up to one week.
When you're ready to bake, remove the aluminum and plastic from the challah (reserve the plastic) and place the braid(s) on a sheet pan. Loosely cover the challah again with the reserved plastic wrap and let it defrost in a warm area for about 2-3 hours (alternatively, defrost in the fridge overnight to bake in the morning). Once the dough has defrosted, continue with step 8.
BAKE IT NICE
- Test for readiness: the challahs are ready for baking when they have approximately doubled in volume and bounce back just slightly when touched.
- Egg wash: beat the reserved egg in a small bowl and gently brush it over the challah, taking care to cover the entire surface without allowing the egg wash to pool. Generously sprinkle with seeds, if desired.
- Gently load the sheet pan into the oven, then immediately lower the temperature to 325 degrees F.
 Preheating higher helps to prevent your oven temperature from dropping too much while you in your baked goods. It also helps to give them a nice golden brown crust without running the risk of over-baking!
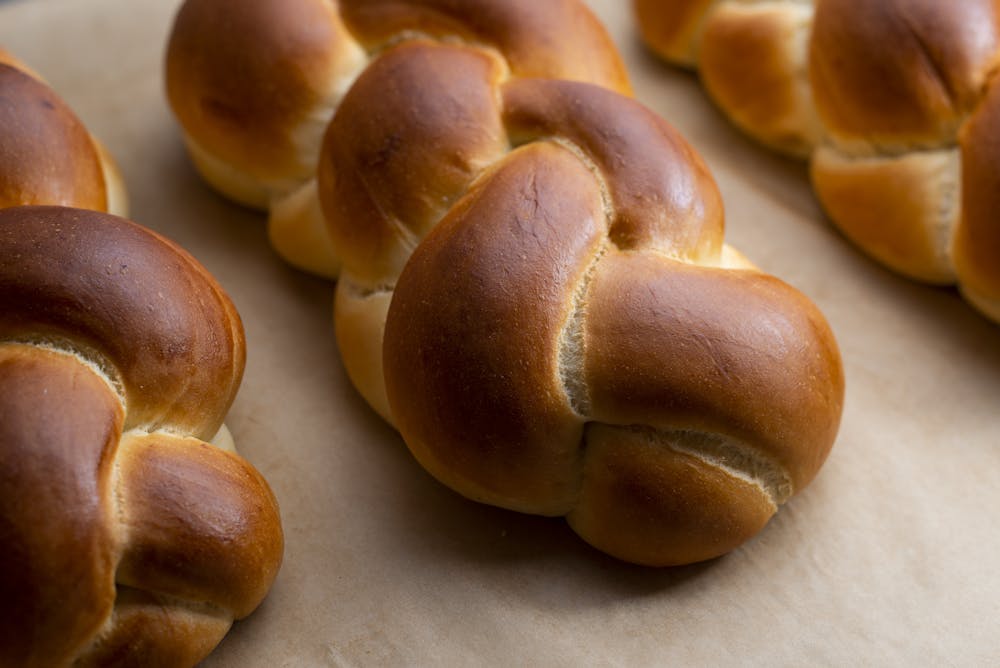
 - Bake for approximately 40 - 50 minutes, rotating the pan halfway through for even color. The challahs are ready when both the top and bottom are dark golden brown and the seams between the braids have started to color just slightly.
- Cool completely before cutting (if you can bear it).
STORING YOUR CHALLAHS
Challah will always be best the same day, but it'll hold well at room temperature up to three days after baking. Store the cooled challahs in a paper bag, bread box or wrapped in plastic.
Kept your challah past its prime? Stale challah has an excellent second life as french toast, bread pudding, croutons or bread crumbs.  You can freeze your challah up to 30 days after it's baked. Allow it to cool completely, then wrap in both plastic wrap and aluminum foil. To defrost, take it out of the freezer and remove the foil. Let sit for about two hours at room temperature, covered in plastic wrap to help wick away excess moisture. Remove the plastic and reheat at 350F for 5-8 minutes before serving
Bake it nice? Show us how you did!
Tag us @breadsbakery or
email us at info@breadsbakery.com
and we may feature your work here!